Window lets you easily debug layouts with a single long press of the home button.
Over the past few months I’ve been working on the initial release of a new tool, Window. This app overlays rulers and grids on screen, along with info on placement of views within your view hierarchy. The goal of this project is to reduce the time it takes to VQA. VQA? Visual Quality Assurance a.k.a. Pixel Pushing a.k.a. Pulling your hair out for that 1 pixel 😵.
The VQA process is slow
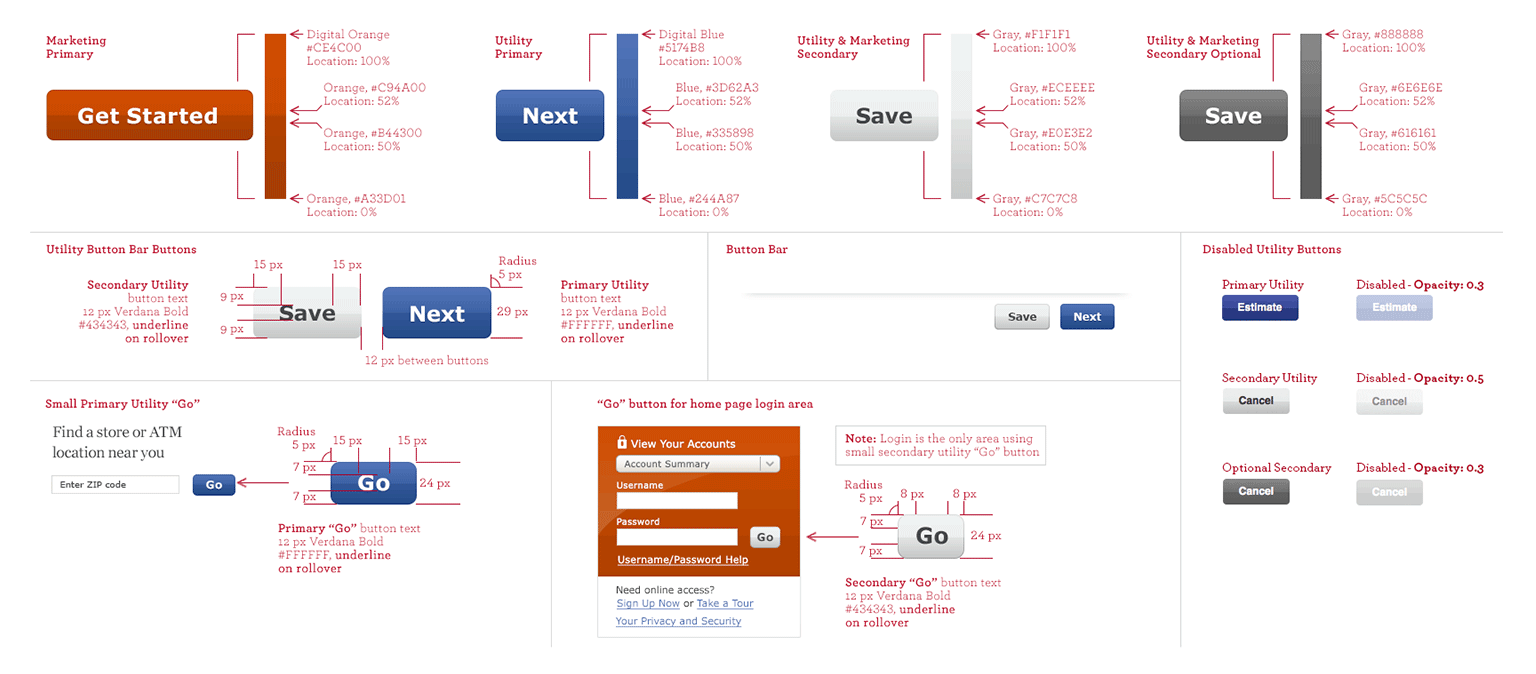
Before the world of Zeplin and Figma, you had redline docs, which were images produced by a designer, and what you’d use to translate the design into something tangible. It had mockups, specs, heights, widths, text sizes, and everything in-between. This is a slow process with lots of back and forth, and the final result was something that roughly looked like what you want. But, what if the redline doc was missing dimensions? What if it just had wrong information? That meant waiting for an update from design #5pmOnFriday.
Today we have powerful tools like Zeplin to help with the redline process. These tools use the dimensions of the labels & images in the source document (Sketch or Photoshop file). This allows you to measure anything in the design, leaving any redline doc in the dust. Zeplin is still dependent on the designer to upload new versions, but it does a good job at removing the risk of having incorrect specs when it’s time to implement.
And then we have Figma. Figma is a very powerful tool, essentially combining Photoshop / Sketch & Zeplin into one product. The source file (the design) is the same file that developer uses to spec out measurements. If there are changes, they are immediately shown. There is one single source of truth, so no need to hand off files and lose track of the most recent one. The comment feature and file history lets you see what’s changed and why. The only thing you need to pass between a designer and developer is a URL.
Whichever design tool we choose, we still need to polish ( 🇵🇱 ಠ‿ಠ). Why? The UI-components measured in PS / Sketch / Figma may not measure to the exact height & width on Android, making this the most tedious step. We have to place what’s shown on screen next to our design and use rulers to make sure our components align.
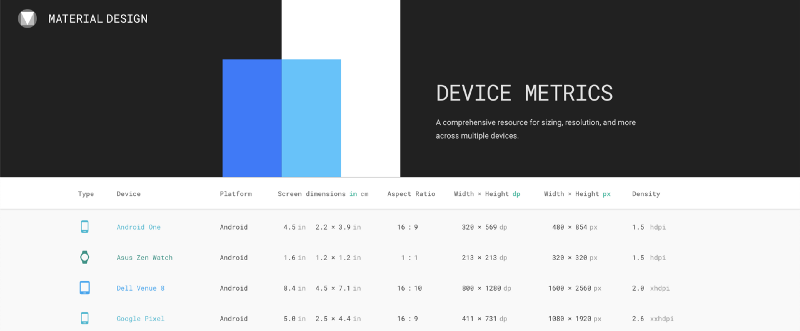
In this step, we need to make sure the design size matches the devices’s size. You’re ready to go if you have a design that is the same resolution and size of the device. You will need to compensate if this is not the case. If the design is on a 360 x 640 artboard (MDPI), the device must also match that spec so that the width is 360dp and the height is 640dp. Example: Nexus 5 and Nexus 5x both have screen resolutions of 1080 x 1920. Both lie in the same density bucket (XXHDPI). However, the physical screen size on the Nexus 5x is 2" larger. This brings the width of the Nexus 5x, in dips, to 411 - not the 360 that we’d expect like that on the Nexus 5.
This is the most common issue at this step. It trips me up when I forget which Emulator I’m running. Luckily, you can create an emulator with a custom screen size to avoid this. A guide like material.io gives important screen spec information.
Now that we have a device that matches our design’s size and resolution, we can scale the design to match the screenshot resolution and compare. We go through the process of dragging a ruler onto screen, and measuring image bounds and text baselines. We screenshot, compare, adjust, build, wait, and repeat.
This is where Window comes into the picture (kind of a pun?). Window reduces the time it takes to VQA because it confirms the placement of UI elements via grids, rulers, and measurements on the device. Developer time is expensive, so the goal is to reduce the frequency of generating builds.
You can download Window from the Google Play Store for free! This project was built with lots of open source software, so my hopes are to open source the project soon too!

How’s it work?
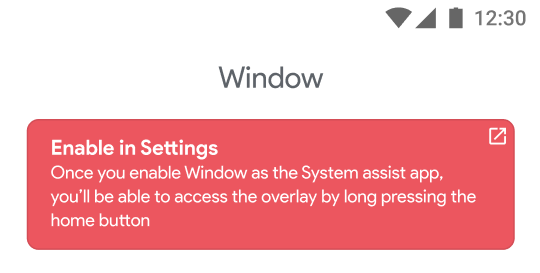
Once you install the app, you’ll be prompted to enable it in the system settings.
Window uses this functionality to get UI information of the screen and a screenshot. It then outlines all views on screen and lets you select and see view dimensions and distances. This overtakes the action for long-pressing home, but you get back to this screen via the Window app settings screen. You can also search for “Assist & Voice Input” within the device’s settings app.
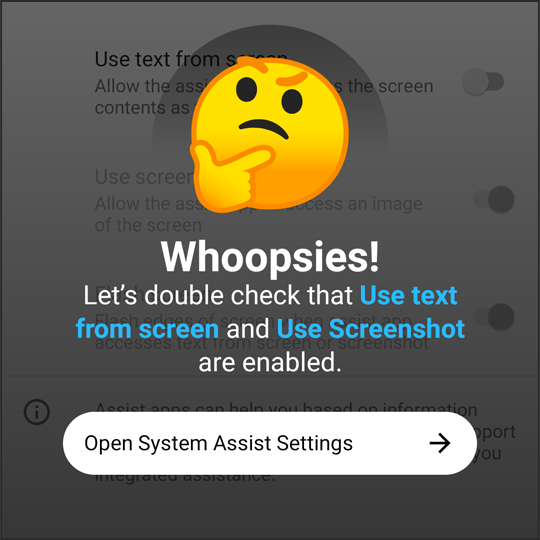
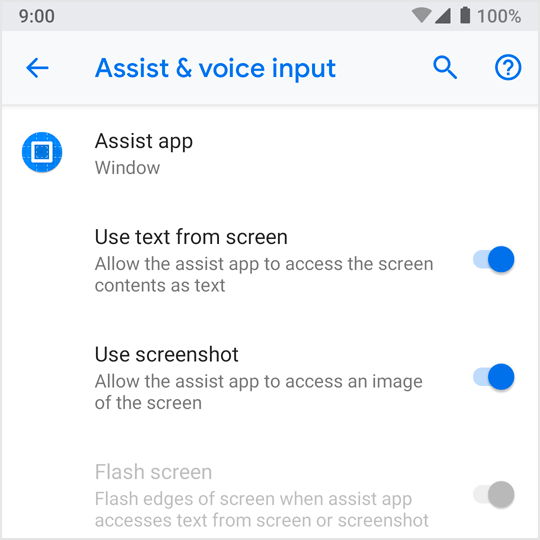
When you enable Window as the system assist app, you also need to enable Use text from screen and Use screenshot. If you attempt to invoke Window by long-pressing the home button without this, you will see a prompt to head back to system settings.
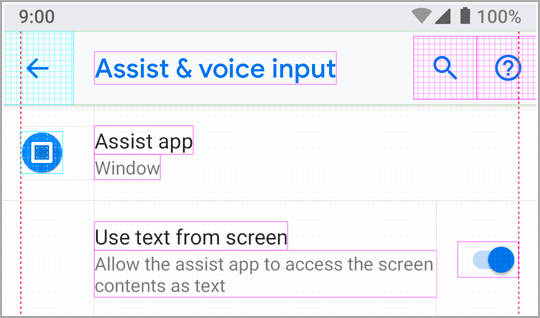
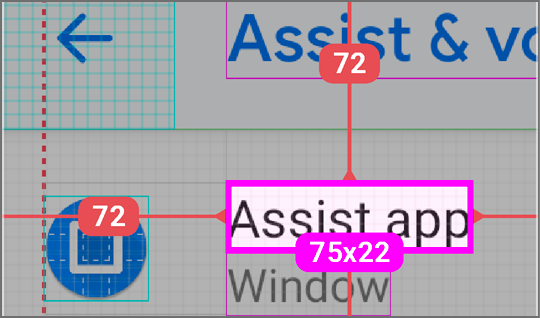
After all settings are enabled successfully, you should see something like this when you long press the home button. You’ll see some default start & end 16dp rulers and the views outlined. A checkered pattern will draw for clickable surfaces. This can be disabled within the Window app.
Default Outline Colors:

Magenta - TextView
Cyan - ImageView
Green - Toolbar
Light Gray - Default
A future update will allow you to customize these colors.
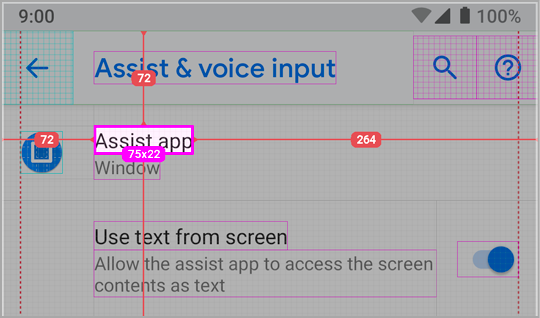
A single tap will let you select a View. It will show the size of the view in DP. You will also see distances from the edge of the screen / content view. You can show pixel values by toggling an option in the Window app. A double tap will allow you to dig in to the view hierarchy, all the way up to the root.
Finally, you can pinch to zoom to get a better eyes view of what’s going on.
The Window App
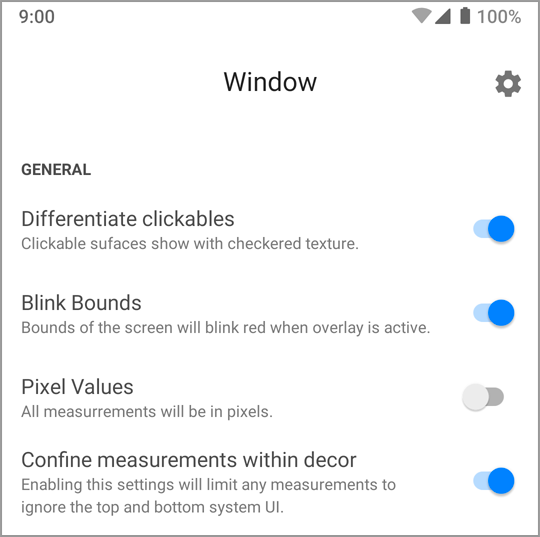
The Window app gives you control over the overlaid content on screen. Some toggles are available to modify behaviors of the overlay, like the ones mentioned before. You can also toggle Rulers, Grids, and View Outlines.
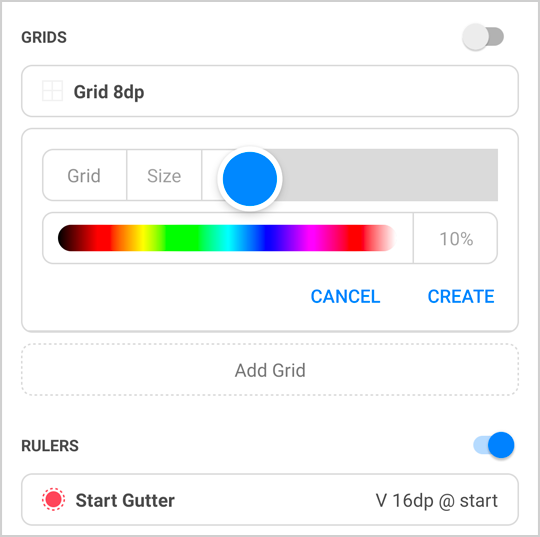
You can create multiple Rulers and Grids, along with Rows and Columns. They are fully configurable, allowing adjustments for colors, widths, offsets, and more!
And that’s it .. so far 😊
I hope you find this tool useful in your development workflow! Feel free to reach out to me at window@dziemia.com for any funky bugs or feature requests. You can also report issues via Send Feedback in the Window app!
Next feature coming up: long press to compare views between each other!
Enjoy & Happy Coding!
Shout out to Olivia Lin, David Redding, and Roberto Orgiu for their help!